Create a Contract
This guide walks you through the step-by-step process of creating a Contract in the system.
Before creating a contract, you must first create a customer. Please review how to add a customer profile and payment method.
1. Navigate to Contracts
Select Contracts from the main navigation menu.

2. Add New Contract
Select New from the Contract Dashboard.

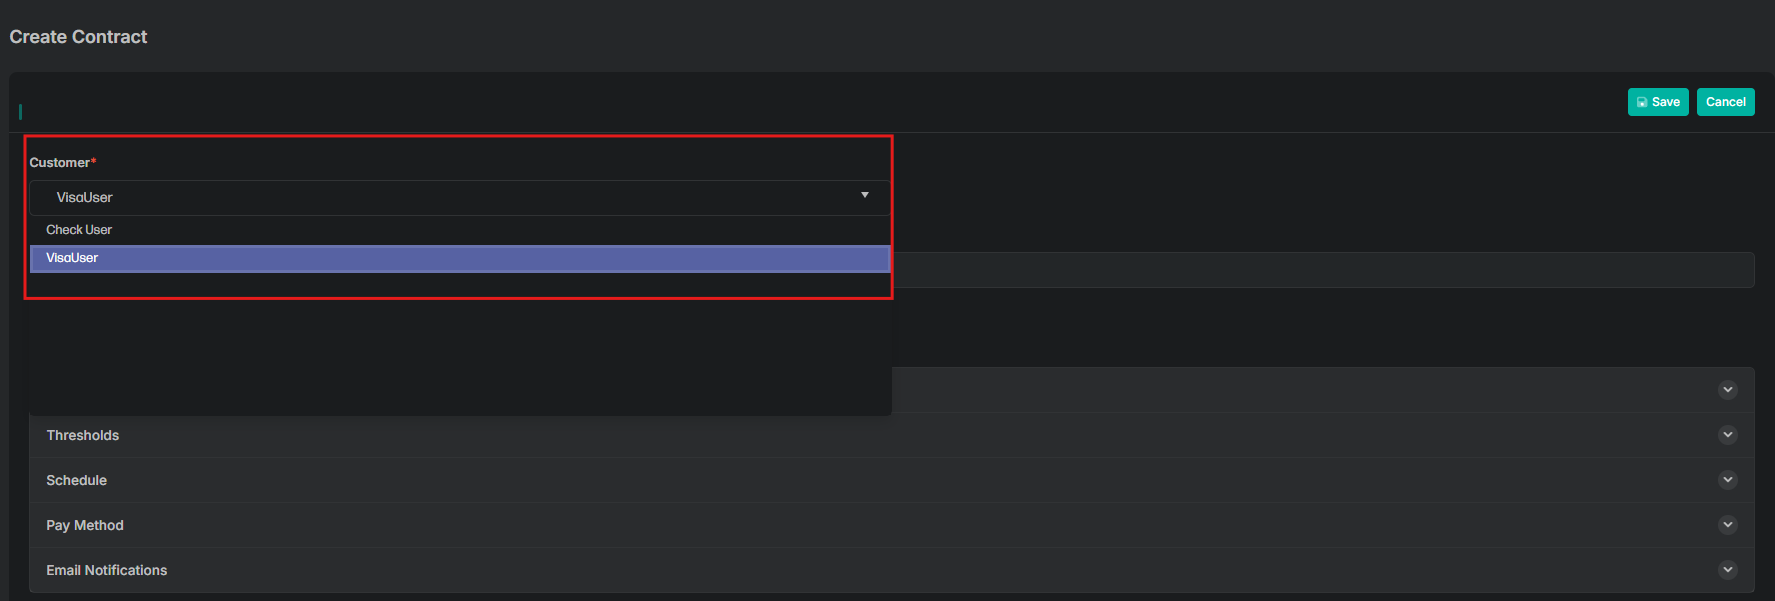
3. Select a Customer (Required)
From the Customer dropdown menu, select a customer.
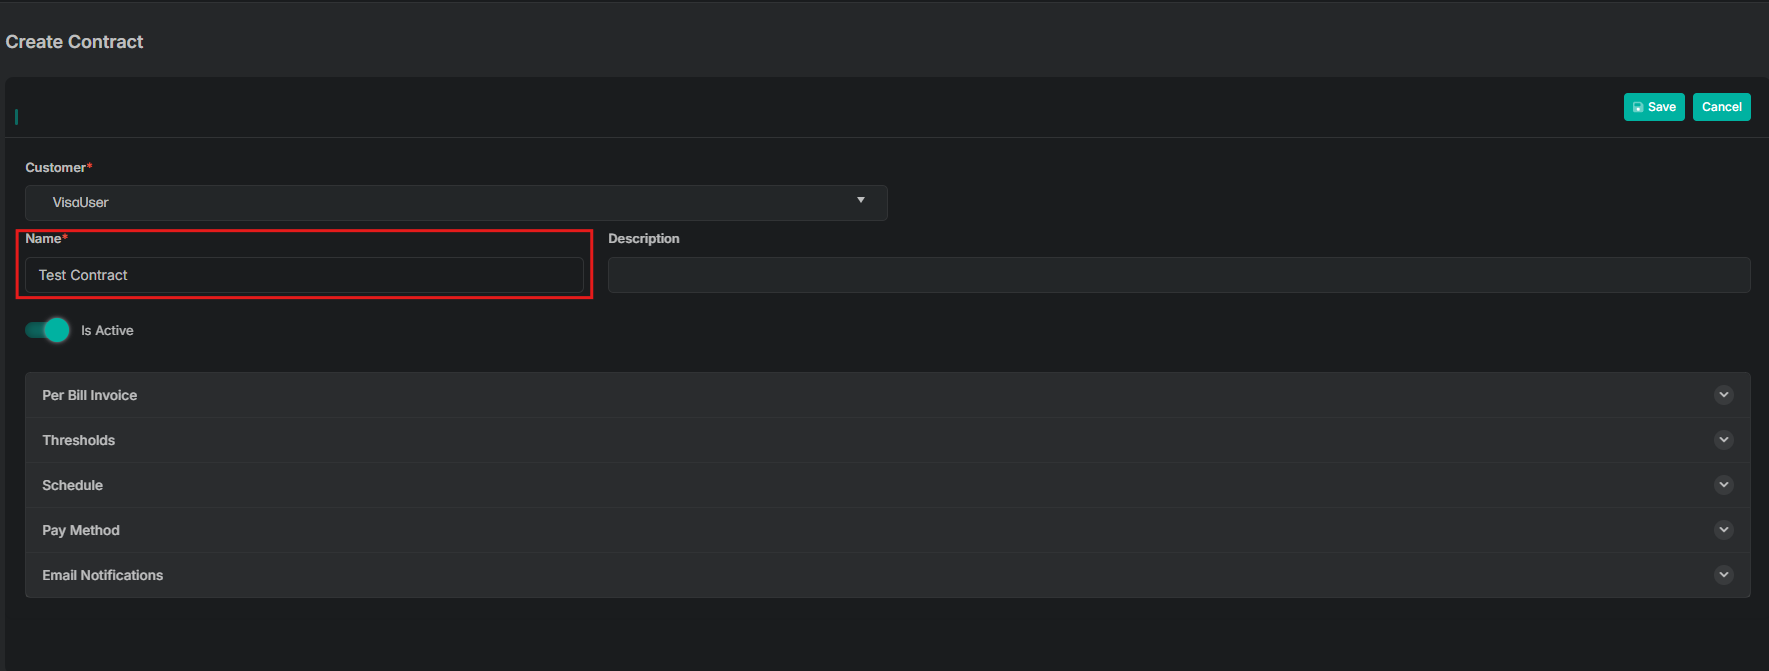
4. Enter a Name for the Contract (Required)
- Enter a Name for your contract
- Toggle Is Active to on to activate the contract
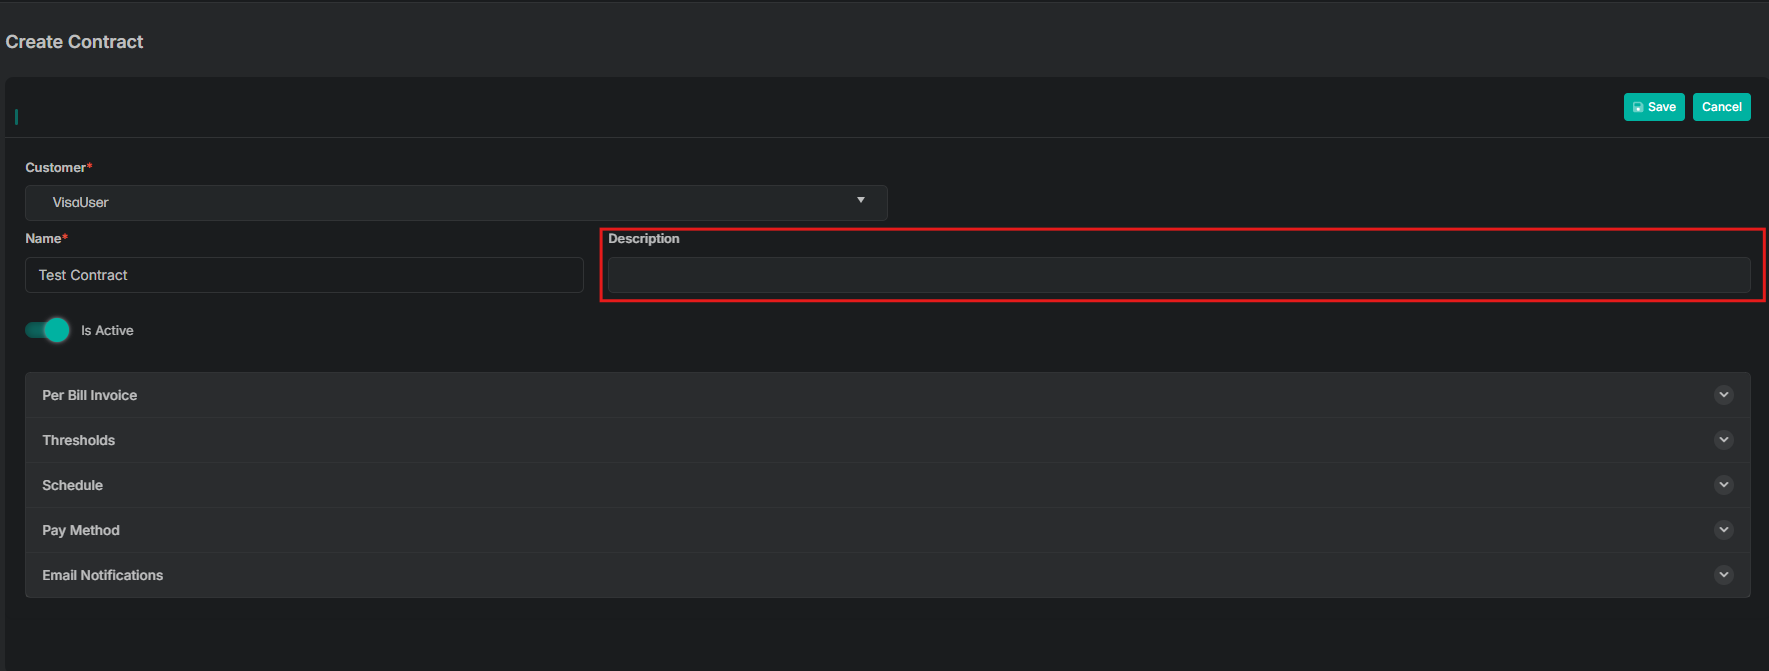
5. Enter a Description for the Contract (Optional)
Enter a description of what the contract is for.
6. Per Bill Invoice
Select the arrow to expand the Per Bill Invoice fields.
- Enter a dollar amount in the Subtotal field (Required)
- Enter a dollar amount in the Tax field (Optional)
- Total will display the total amount charged each time the contract is executed

7. Thresholds (Optional)
Select the arrow to expand the Threshold fields.
| Field Name | Description |
|---|---|
| Max Amount | The maximum amount billed before this contract is automatically disabled |
| Max Payments (Count) | The maximum number of payments completed before this contract is automatically deactivated |
| Max Successful Bills | The maximum number of successful executions before this contract is automatically deactivated |
| Max Failed Executions | The maximum number of failed executions before this contract is automatically deactivated (0 = do not reprocess) |
| Failure Interval | The interval over which max failures is calculated |
| Failure Period | The period of time over which max failures is calculated |

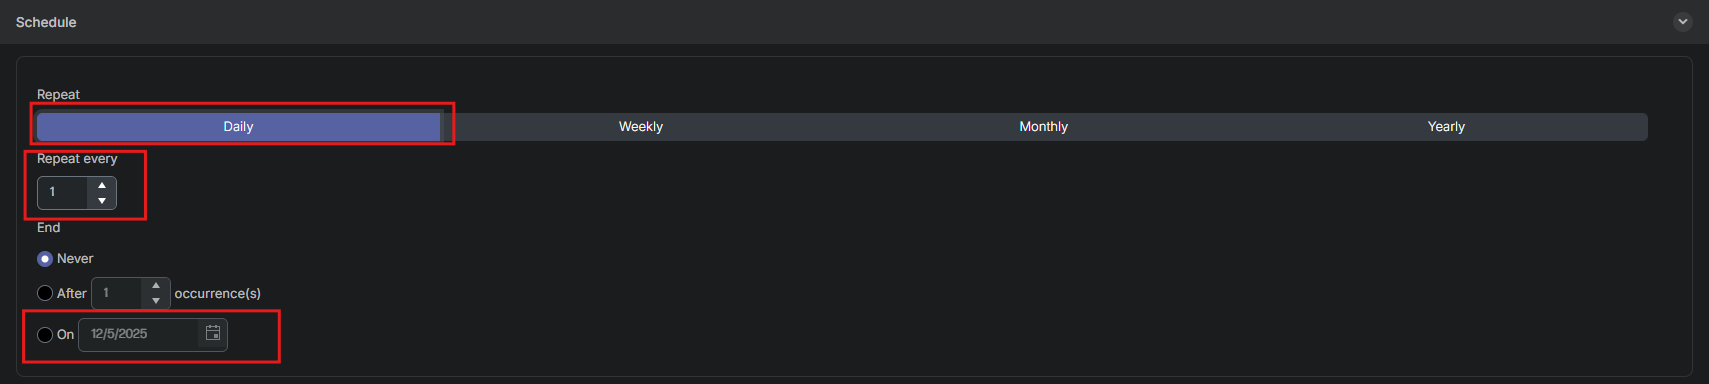
8. Schedule
Select the arrow to expand the Schedule fields.
Schedule Types
Setting up daily contract executions:
- Set Repeat Every to 1 to have the contract run once daily
- Set End to the last date you want the contract to execute
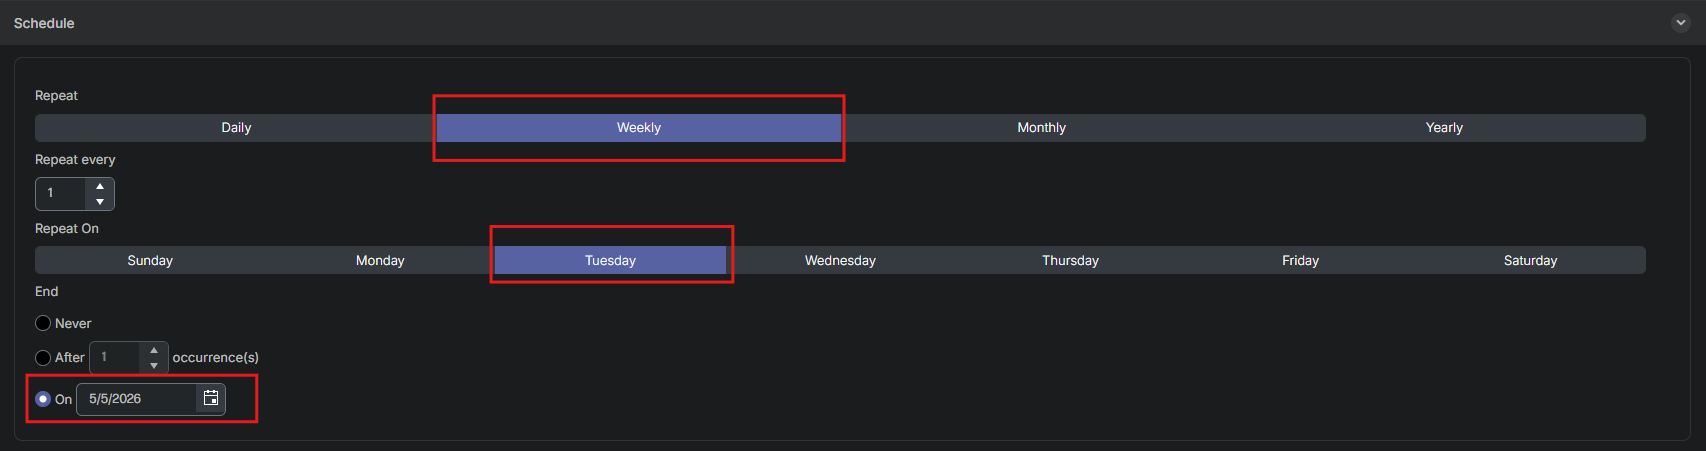
Setting up weekly contract executions:
- Set Repeat Every to 1 to have the contract run once every week
- Set Repeat On to select the day of the week (e.g., Tuesday) for contract execution
- Set End to the last date you want the contract to execute
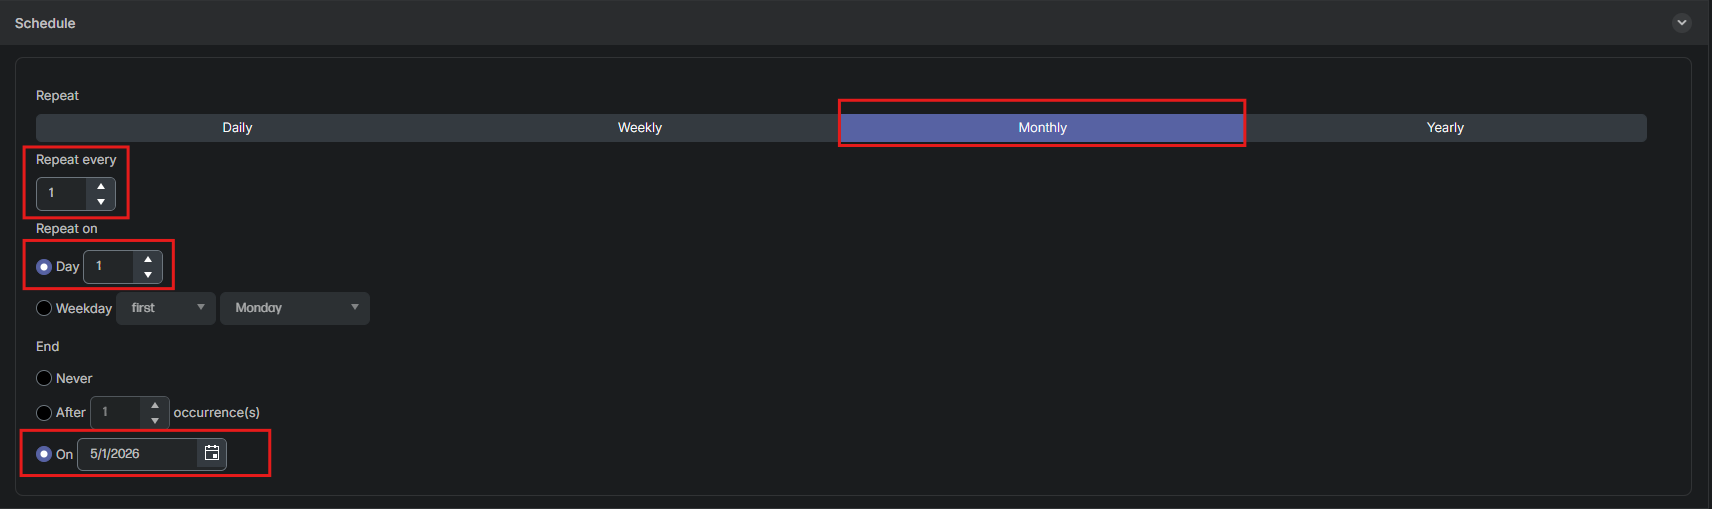
Setting up monthly contract executions:
- Set Repeat Every to 1 to have the contract run once every month
- Set Repeat On to Day 1 to have the contract run on the 1st of every month
- Set End to the last date you want the contract to execute
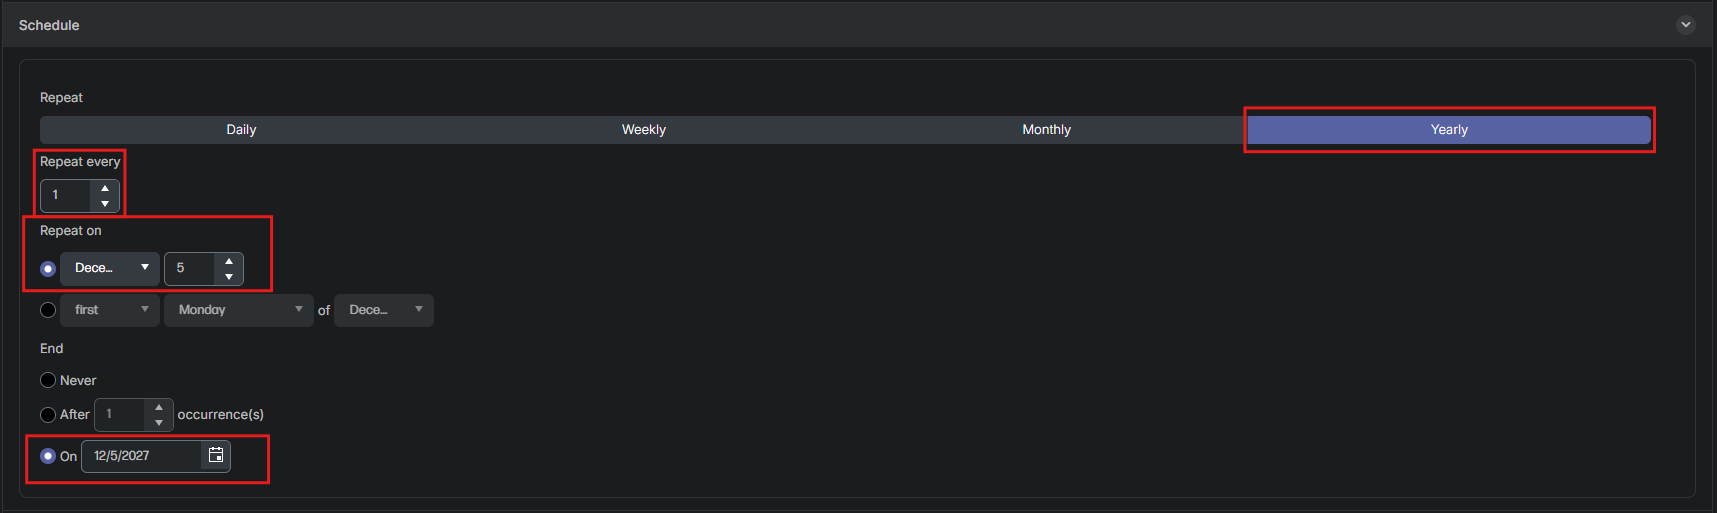
Setting up yearly contract executions:
- Set Repeat Every to 1 to have the contract run once a year
- Set Repeat On to a specific date (e.g., December 5) to have the contract run on that date every year
- Set End to the last date you want the contract to execute
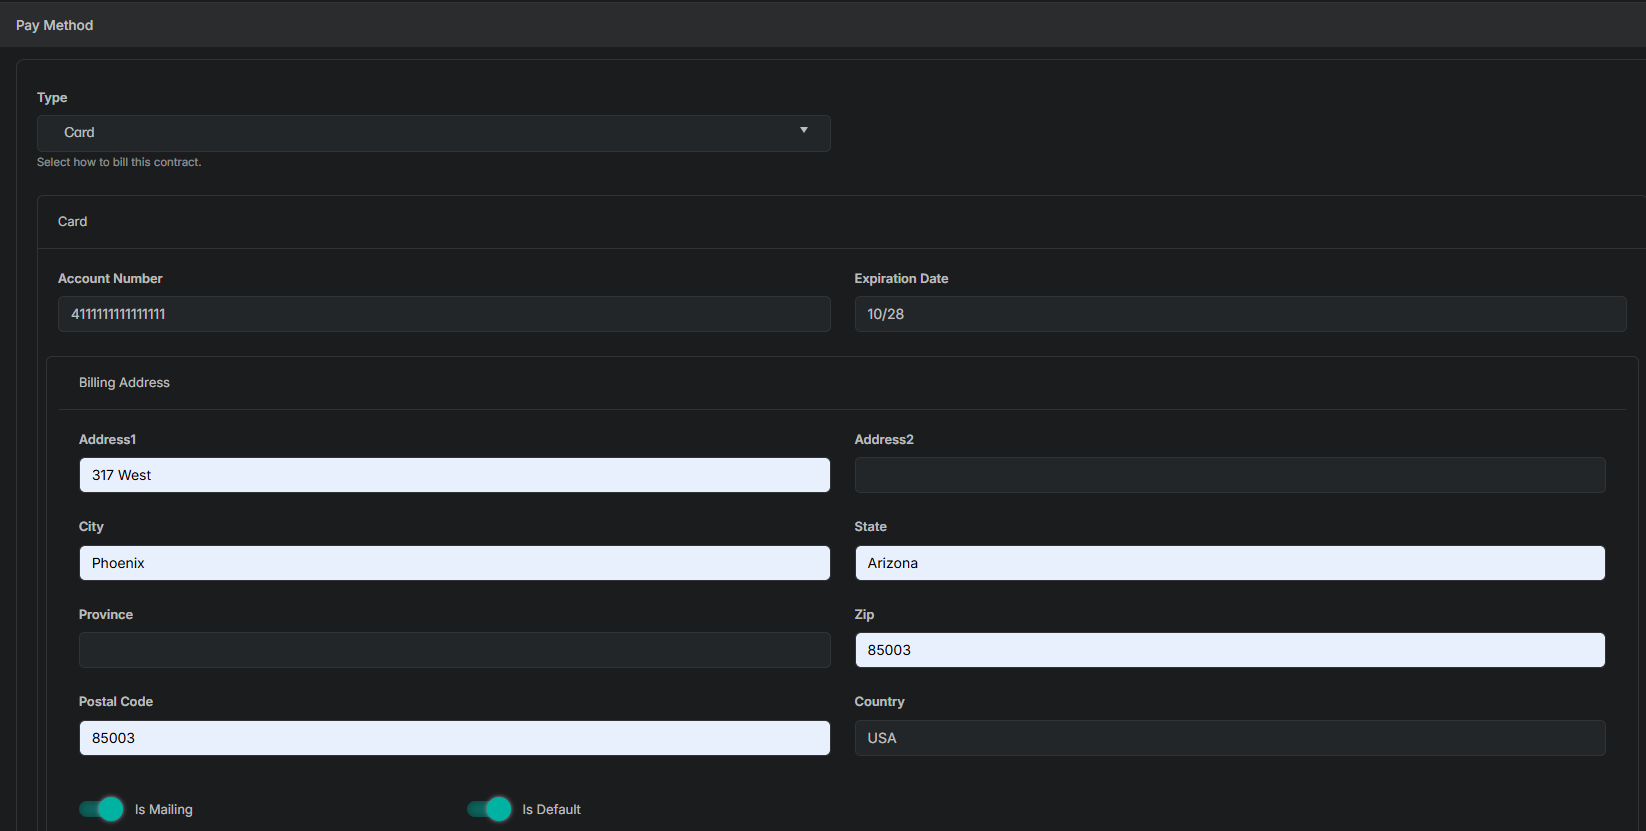
9. Payment Method
Select the arrow to expand the Payment fields.
- From the Type dropdown menu, select the payment type you would like to use (e.g., card)
- Enter Account Number (Required)
- Enter Expiration Date (Required)
- Enter Address1 (Optional)
- Enter Address2 (Optional)
- Enter City (Optional)
- Enter State (Optional)
- Enter Province (Optional)
- Enter ZIP (Optional)
- Enter Postal Code (Optional)
- Enter Country (Optional)
- Toggle Is Mailing if the billing address is the same as the mailing address
- Toggle Is Default if this will be the default address for the payment type
- Enter Cardholder Name

10. Email Notifications
Select the arrow to expand the email notification options.
- Toggle Email customer on approval to send an email to the customer when a contract successfully executes
- Toggle Email customer on failure to send an email to the customer when a contract fails to execute
- Toggle Email merchant on approval to send an email to the merchant when a contract successfully executes
- Toggle Email merchant on failure to send an email to the merchant when a contract fails to execute
11. Save
When all information is entered, scroll to the top of the page and select Save.

Updated 8 months ago