Merchant Initiated Payments ( MIT )
As an app developer you might want to get the user's authorization to charge their card at a later date or to charge their card on a regular basis as part of recurring subscription payments. This is accomplished using Merchant Initiated Payments ( or MIT )
MIT Payments follows a simple flow for payment to happen from your server. These payments only require a one-time consent from the user alongside card information. Once that one-time consent from the user is captured, your server can perform MIT payments from your server at a later date without the user visiting your website or app
Wink Login is Mandatory for MITIn order for the user consent to be captured and stored by Wink, and for Wink to tokenize the card and make it available to be charged later for subscriptions, a user must have a Wink Account and be authenticated by Wink Login.
MIT feature of the Wink Payment SDK is NOT available in GUEST MODE !!
Here are the steps to perform a MIT Payment
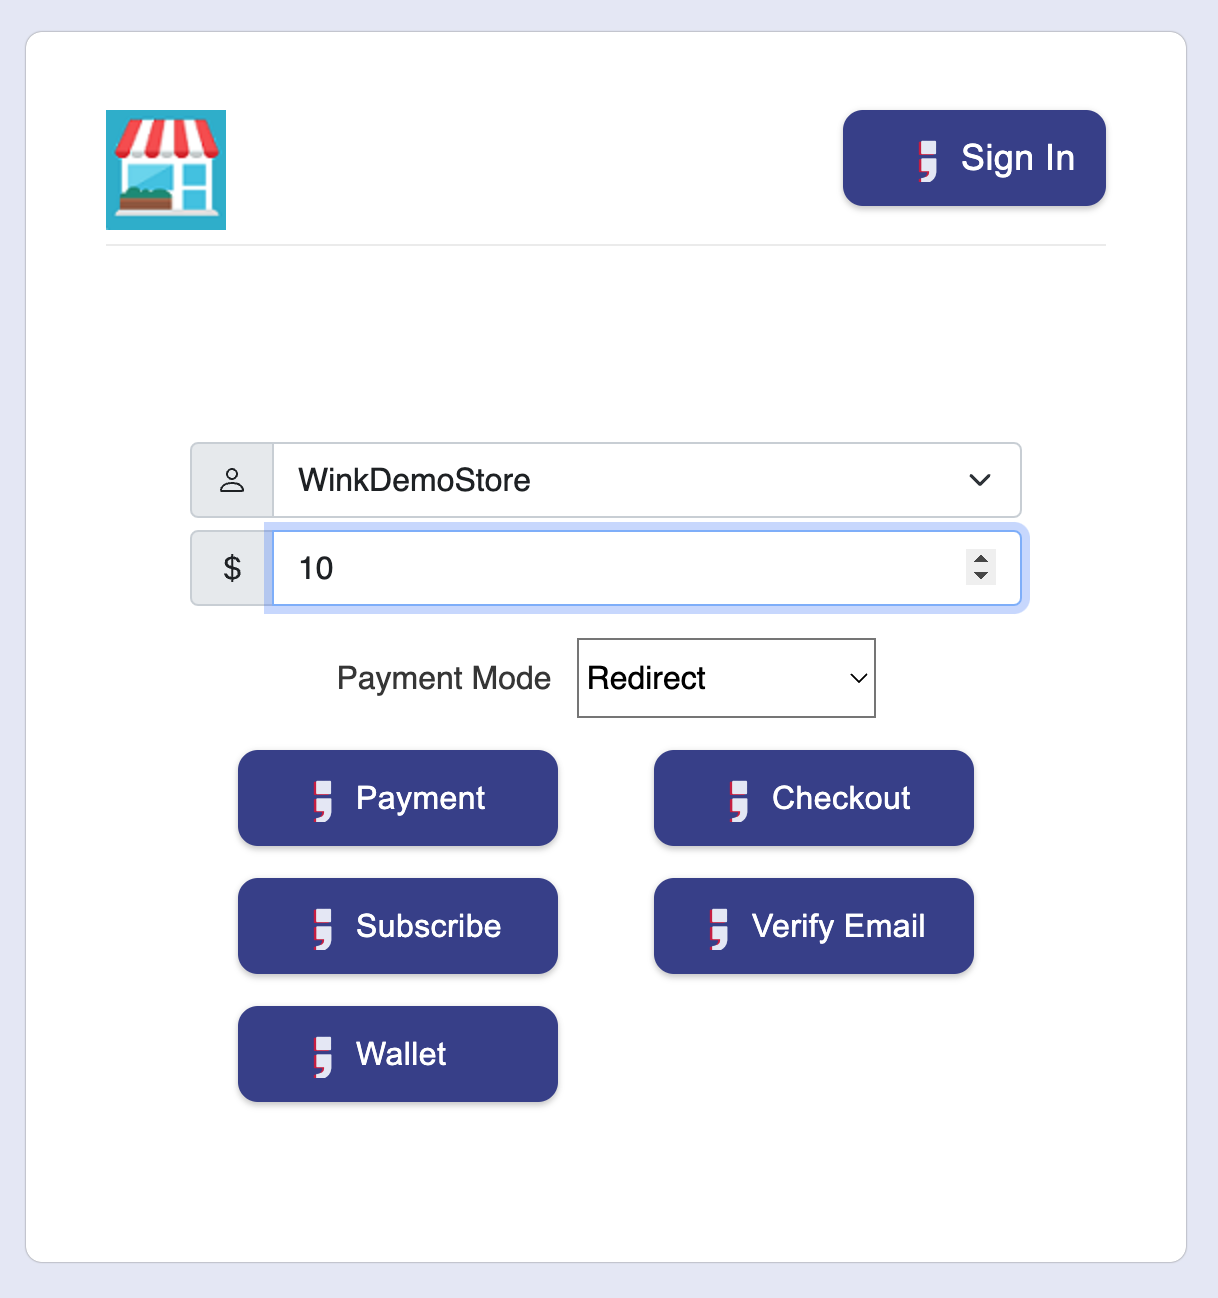
Step 1: Add a Subscribe Button to your application
In order to collect the user consent to be charged later, you can add a subscribe button on your application. This can be called something else depending on your exact flow and requirements
As explained above, the Subscribe button should only be placed on a page where the user is signed-in using Wink Login
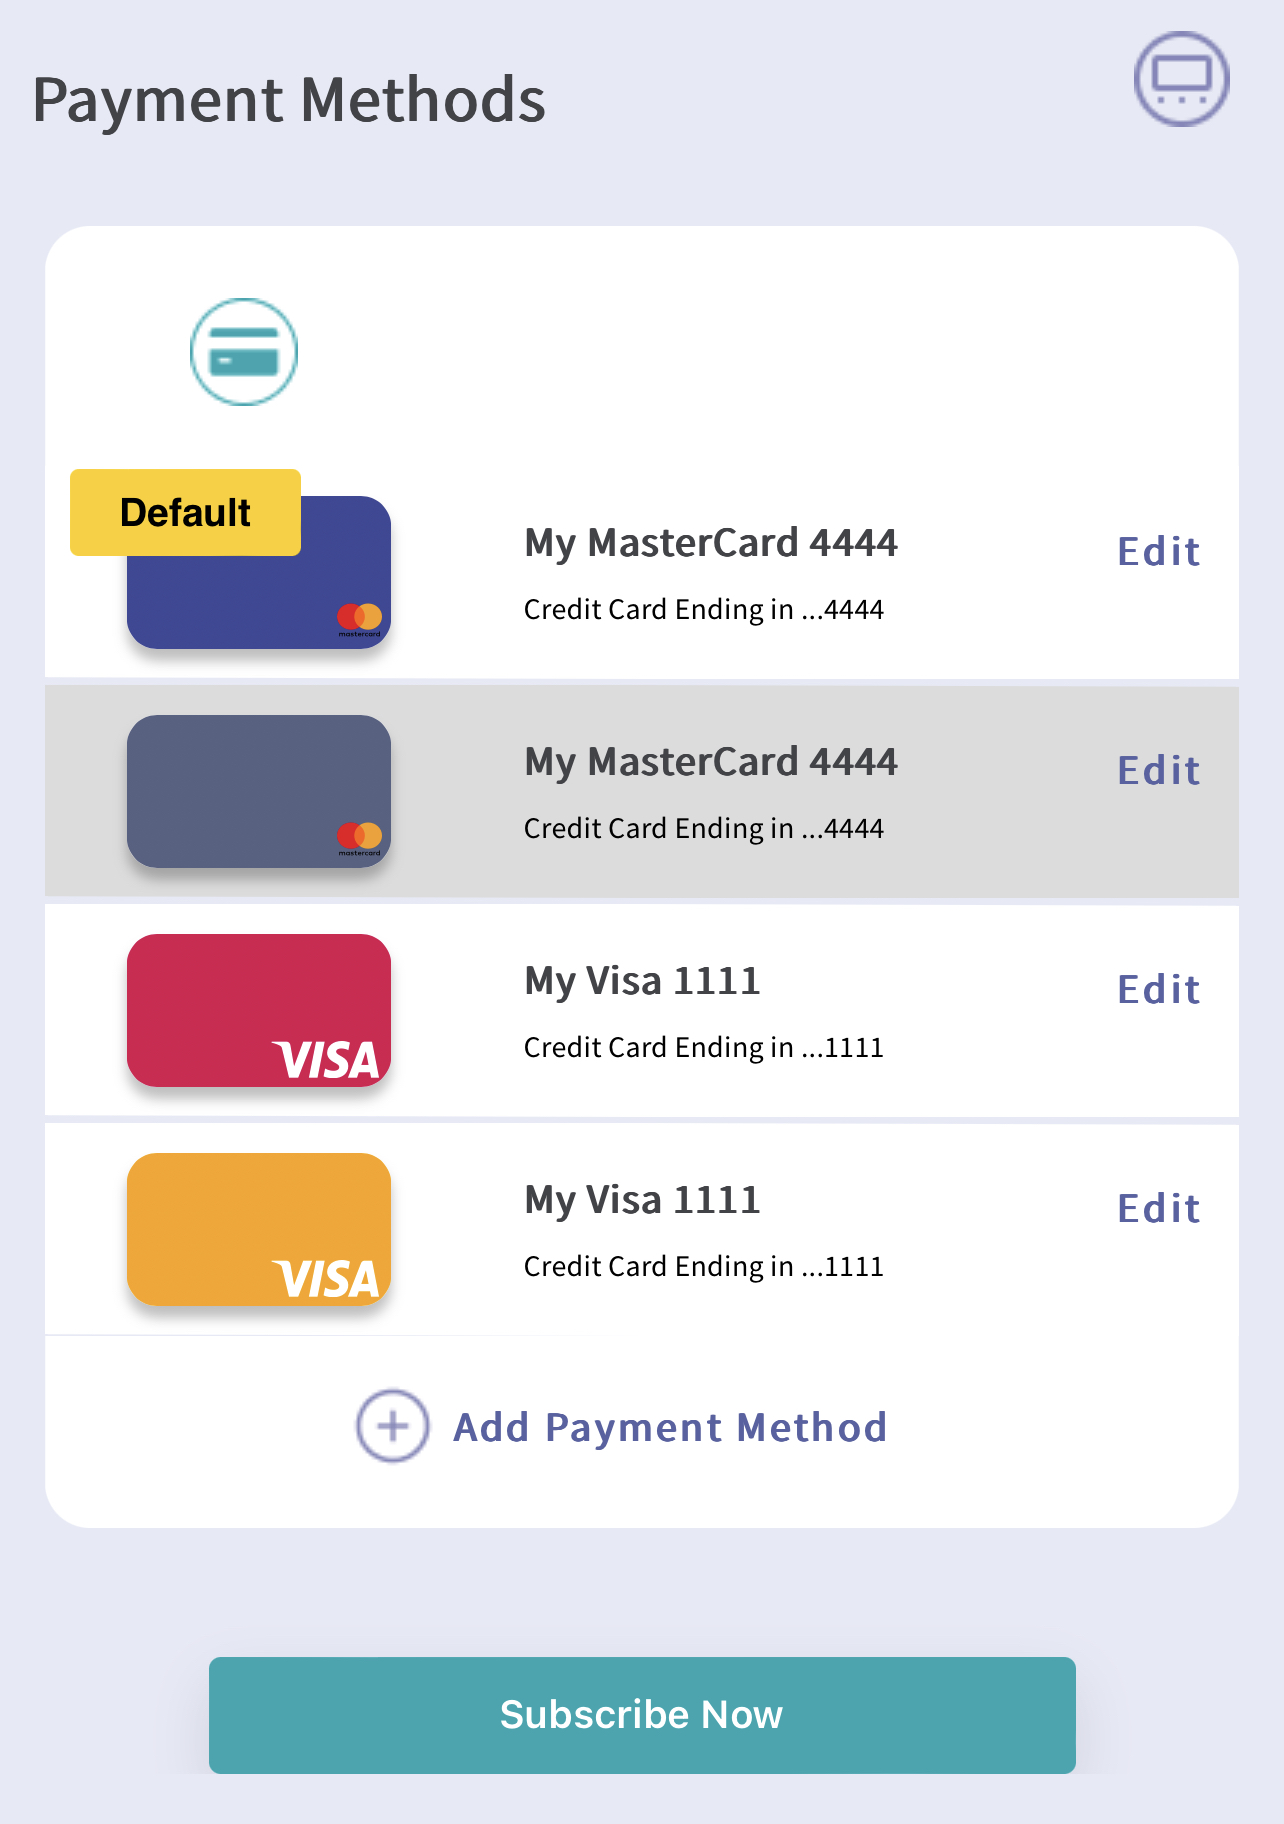
Step 2: Manage Payment Methods
When the user clicks the Subscribe button, you have to initiate the Wink Payment SDK in the Subscribe/MIT mode. The user will be redirected to the Management Payment Methods flow as described before ( same as CIT where the user can add a card or select a previously added card
Step 3: Completing the Consent
Once the user has finished selecting the card to be used for Subscription, the Wink Payment SDK will display the "Subscribe Now" button ( instead of the Pay button ).
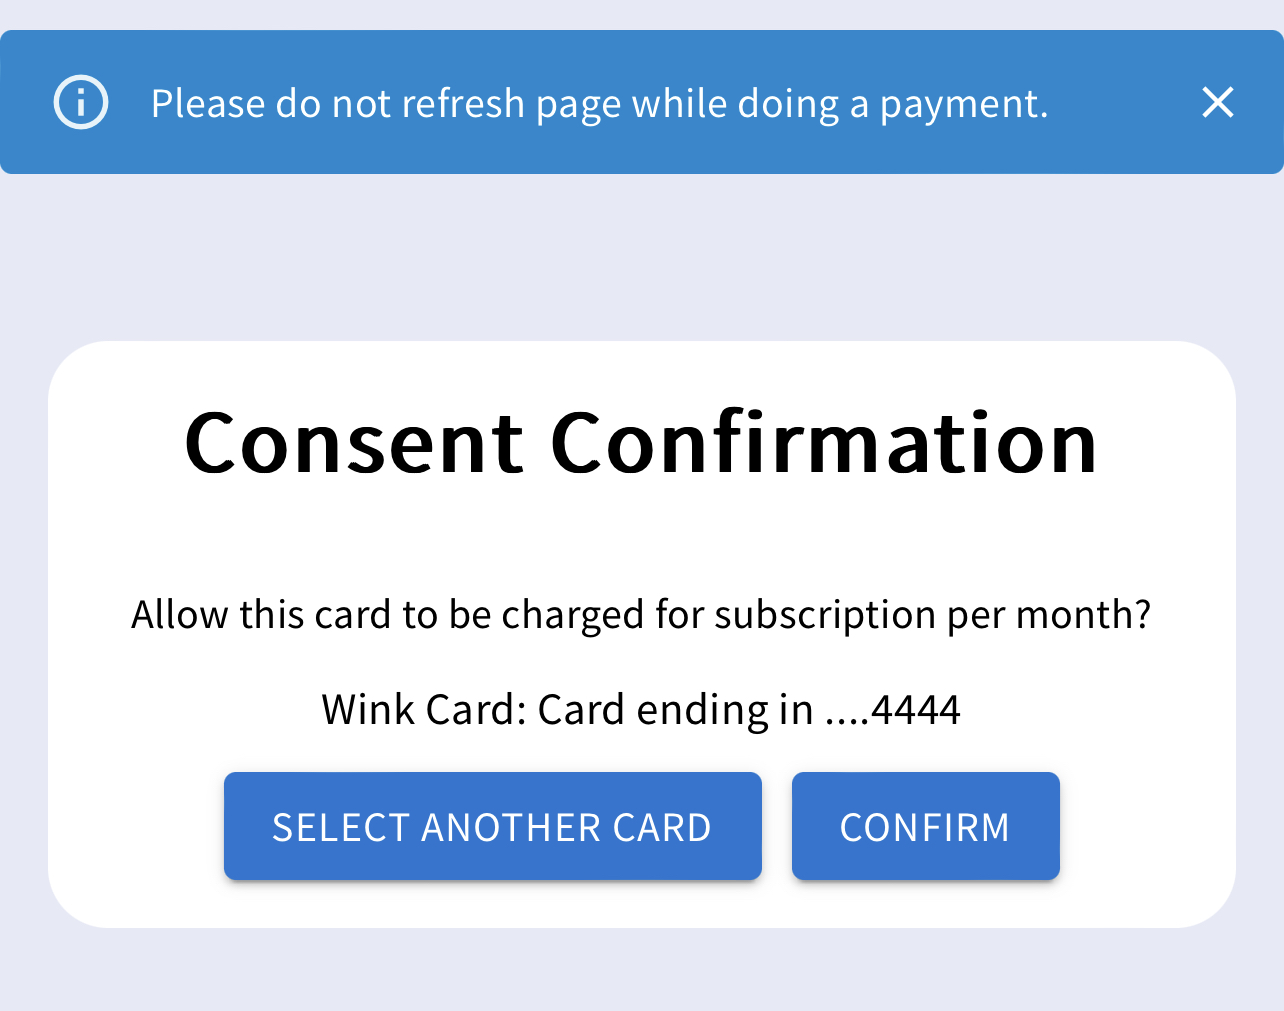
Once the user clicks a confirmation page will be presented to double confirm the intention for the user to use this card for future MIT payment
Step 4: Processing the Payment
Once the user has clicked the confirm button, the Wink Payment SDK will complete and provide the details of the selected card to you as the developer. The information is returned in the form of a card token that looks like this.

This token can be stored by you on your server for making the Purchase API call from your server at a later date.
Updated over 1 year ago
What’s Next
Now that you have understood the payment user experiences, lets look at how to integrate Wink Payments to your website or app